Bottom Navigation Bar in Kotlin
How to add the bottom Navigation Bar in your Android App with Navgraph?


What is Bottom Navigation Bar?
BottomNavigationView makes it easy for users to explore and switch between top-level views in a single tap. There should be a minimum of 3 top-level views and a maximum of 5. If Destinations are more than 5 then use the Navigation Drawer. When the user taps on the icon it will change the top-level view accordingly. In a Music Player app to switch between Home, Album, and Radio, it can be used. Google plus app uses this widget to switch between different views. Instagram uses BottomNavigationView to switch between Feeds, Search, add, Like, and Profile.
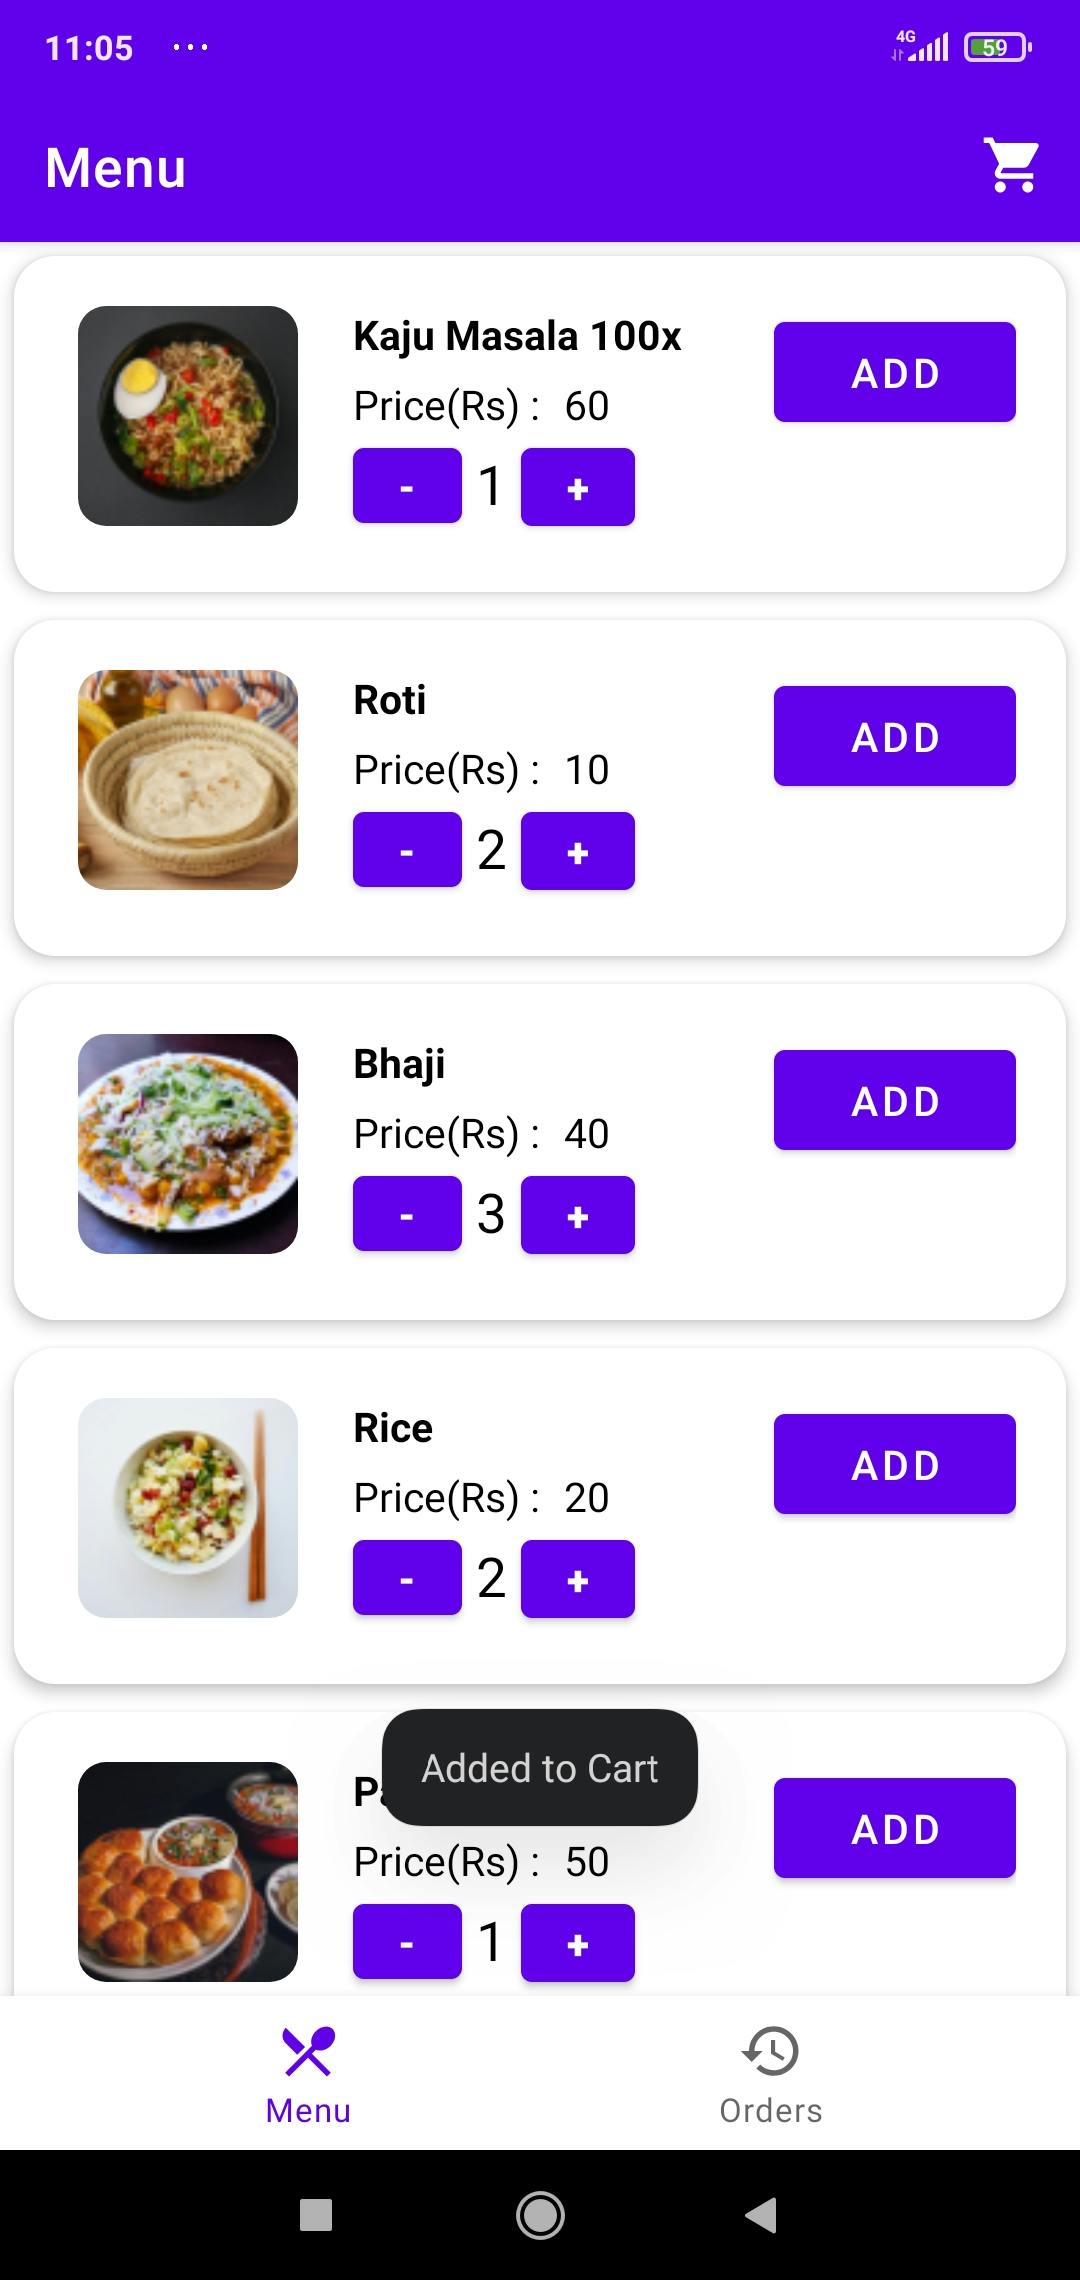
This is how a BottomNavigationView looks like.

How to add Bottom Navigation Bar?
Step 1 - Go to activity_main.xml.
Here, we will include the Fragment Container View, which serves as a container for Fragments, as well as adds the Bottom Navigation View. The code for the activity main.xml file is shown below.
<?xml version="1.0" encoding="utf-8"?>
<?xml version="1.0" encoding="utf-8"?>
<androidx.constraintlayout.widget.ConstraintLayout xmlns:android="http://schemas.android.com/apk/res/android"
    xmlns:app="http://schemas.android.com/apk/res-auto"
    xmlns:tools="http://schemas.android.com/tools"
    android:layout_width="match_parent"
    android:layout_height="match_parent"
    tools:context=".MainActivity">

    <com.google.android.material.bottomnavigation.BottomNavigationView
        android:id="@+id/bottomNavigationView"
        android:layout_width="match_parent"
        android:layout_height="wrap_content"
        app:menu="@menu/bottom_menu"
        app:layout_constraintBottom_toBottomOf="parent"
        app:layout_constraintStart_toStartOf="parent"
        app:layout_constraintEnd_toEndOf="parent"
        />
    <androidx.fragment.app.FragmentContainerView
        android:id="@+id/nav_host_fragment"
        android:name="androidx.navigation.fragment.NavHostFragment"
        android:layout_width="0dp"
        android:layout_height="0dp"
        app:layout_constraintLeft_toLeftOf="parent"
        app:layout_constraintRight_toRightOf="parent"
        app:layout_constraintTop_toTopOf="parent"
        app:layout_constraintBottom_toTopOf="@id/bottomNavigationView"
        app:defaultNavHost="true"
        app:navGraph="@navigation/nav_graph" />

</androidx.constraintlayout.widget.ConstraintLayout>
We will create a bottom_menu.xml and nav_graph.xml in the next steps.
Step 2 - Create a nav_graph.xml.
Add below dependencies to your app-level build.gradle
    implementation("androidx.navigation:navigation-fragment-ktx:2.3.5")
    implementation("androidx.navigation:navigation-ui-ktx:2.3.5")
Right-click on the res folder and select Android Resource Directory. Make sure to select the resource type as navigation and create a new file named nav_graph.xml. We add our fragments to this file to make it easier to traverse between them.
Step 3 - Create two fragments and add them to the nav graph.
Right-click on com.your-package-name and then New>Fragment>Fragment(Blank) and remove the boilerplate code.
MenuFragment.kt
class MenuFragment : Fragment(R.layout.fragment_menu) {

}
HistoryFragment.kt
class HistoryFragment : Fragment(R.layout.fragment_history) {

}
nav_graph.xml
<?xml version="1.0" encoding="utf-8"?>
<navigation xmlns:android="http://schemas.android.com/apk/res/android"
    xmlns:app="http://schemas.android.com/apk/res-auto"
    xmlns:tools="http://schemas.android.com/tools"
    android:id="@+id/nav_graph.xml"
    app:startDestination="@id/menuFragment">
    <fragment
        android:id="@+id/menuFragment"
        android:name="com.appoitment.navigationcomponent.MenuFragment"
        android:label="fragment_menu"
        tools:layout="@layout/fragment_menu" />
    <fragment
        android:id="@+id/historyFragment"
        android:name="com.appoitment.navigationcomponent.HistoryFragment"
        android:label="fragment_history"
        tools:layout="@layout/fragment_history" />
</navigation>
Step 4 - Create bottom_menu.xml
Right-click on the res folder and select Android Resource Directory. Make sure to select the resource type as a menu. Now create the bottom_menu.xml file and add the following code. In this file, we add the title, id, and icon of our menu for BottomNavigationView.
Note:- Check that the item's id in bottom_menu.xml matches its fragment's destination id in nav_graph.xml. Otherwise, you will get the error. And make sure to add the icons in drawable from android clipart in vector assets.
bottom_menu.xml
<?xml version="1.0" encoding="utf-8"?>
<menu xmlns:android="http://schemas.android.com/apk/res/android">
    <item android:id="@+id/menuFragment"
        android:title="@string/canteen"
        android:icon="@drawable/ic_menu" />
    <item android:id="@+id/historyFragment"
        android:title="@string/order_history"
        android:icon="@drawable/ic_history" />
</menu>
Step 5 - Go to your MainActivity.kt
Here I have used ViewBinding so make sure to add the following code in the app-level build.gradle
buildFeatures{
        viewBinding true
    }
Add following code :- ```class MainActivity : AppCompatActivity() {
private lateinit var binding: ActivityMainBinding
private lateinit var navController: NavController


override fun onCreate(savedInstanceState: Bundle?) {
    super.onCreate(savedInstanceState)
    setContentView(R.layout.activity_main)
    binding = ActivityMainBinding.inflate(layoutInflater)
    setContentView(binding.root)

    val navHostFragment = supportFragmentManager
        .findFragmentById(R.id.nav_host_fragment) as NavHostFragment

    //Each NavHostFragment has a NavController that defines valid navigation within the navigationhost.
    navController = navHostFragment.navController


    setupActionBarWithNavController(navController)
    binding.bottomNavigationView.setupWithNavController(navController)

}

override fun onSupportNavigateUp(): Boolean {
    return navController.navigateUp() || super.onSupportNavigateUp()
}
} ```
Yes, you have designed a bottom navigation bar for your Android app. You can now add your content to the fragments and change the bottom navigation bar icons and colours to your liking. Just like this -